Overview
This KB serves as a step-by-step instruction on how to configure New Outlook Add-in when you install Client Apps to your Resource Central server. Refer to RC Client Apps Installation Guide to learn how to install Client Apps.
Step-by-step configuration
“Client Apps” category is only visible on Resource Central backend if you have installed new add-in to Resource Central server.
Step 1: Register app in Azure AD
Follow these three steps to create an app:
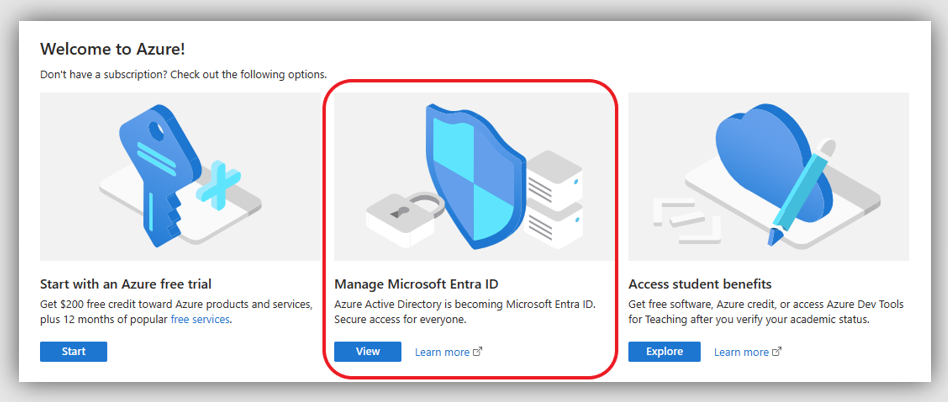
Navigate to Azure portal ➔ Manage Microsoft Entra ID ➔ App registrations and click [New registration].
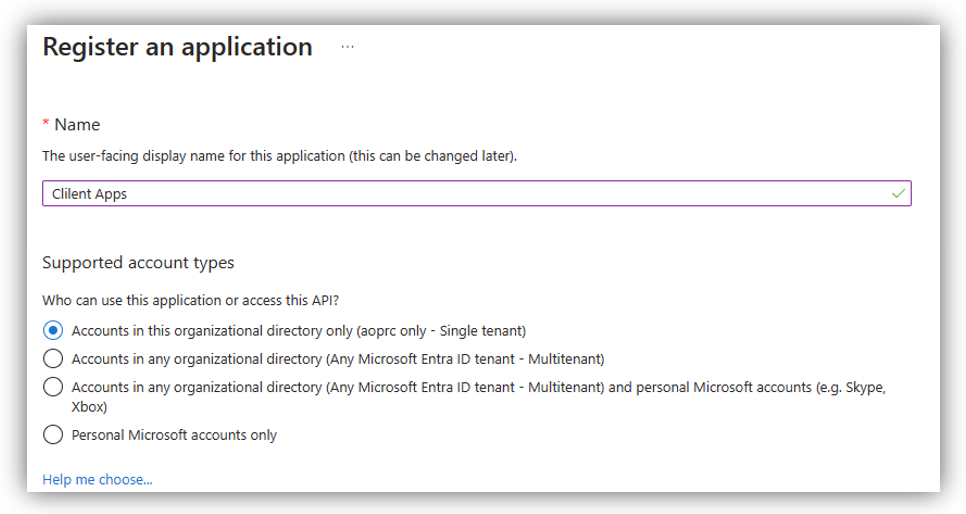
Enter the application Name and select ‘Accounts in this organizational directory only (… only – Single tenant) in Supported account types section.
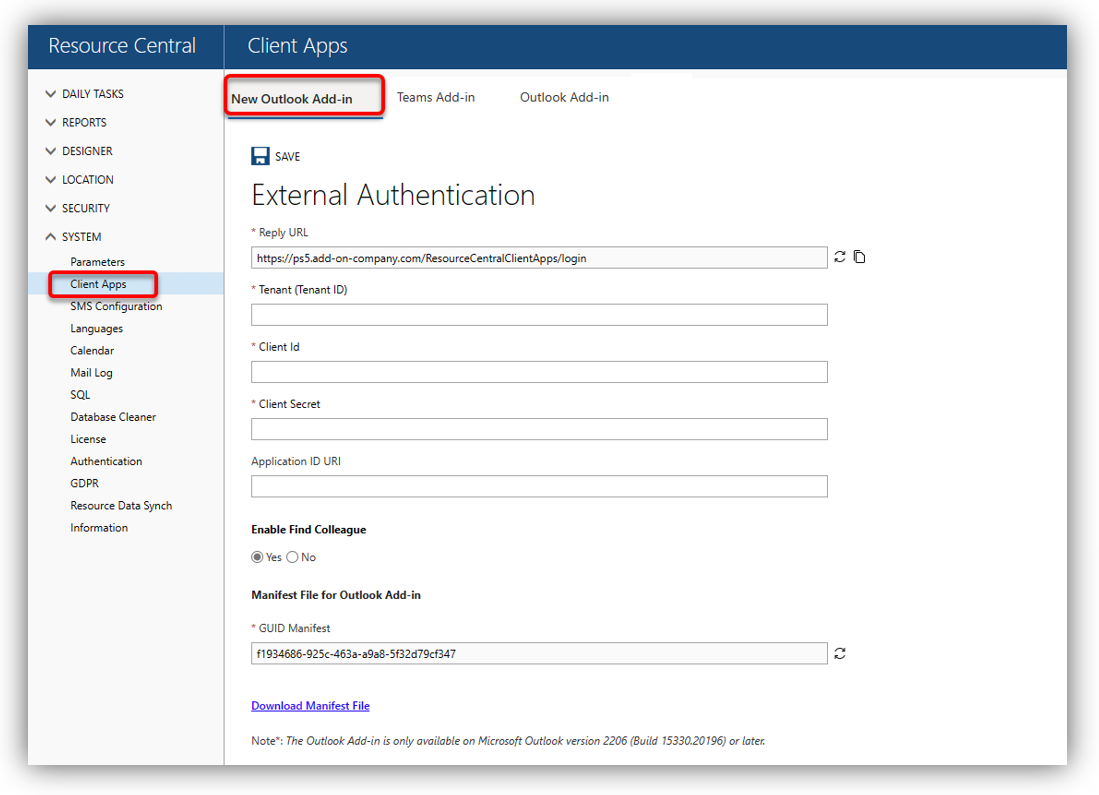
Scroll down to Redirect URI (optional) section and select “Single-page application (SPA)” as a platform. Then, paste the Reply URL of Client Apps category on Resource Central backend to the right box.
Click [Register] button at the bottom of the screen. Your app will then be created in your Azure tenant.
Step 2: Configure API permissions in Azure AD
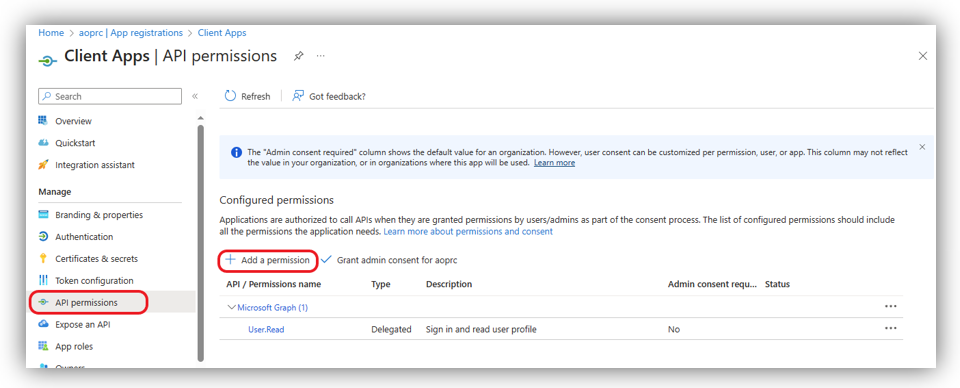
On your Azure app for Client Apps configuration, go to API permissions then click [Add a permission]:
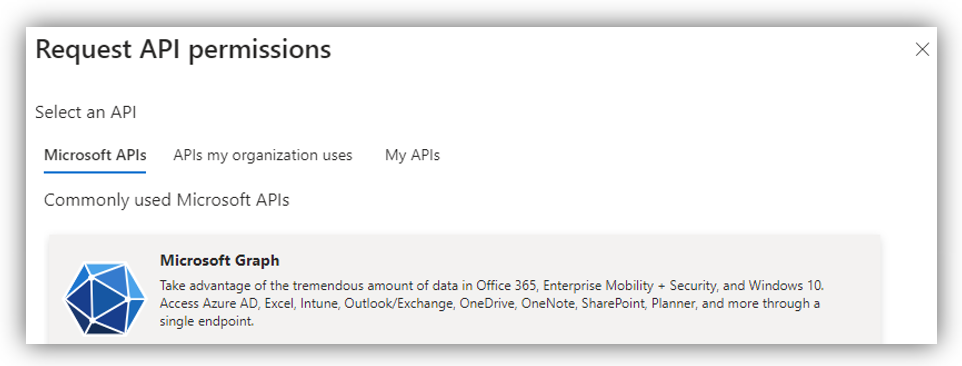
After that, the Request API permissions screen will appear, in which you select Microsoft APIs ➔ Microsoft Graph ➔ Delegated permissions:
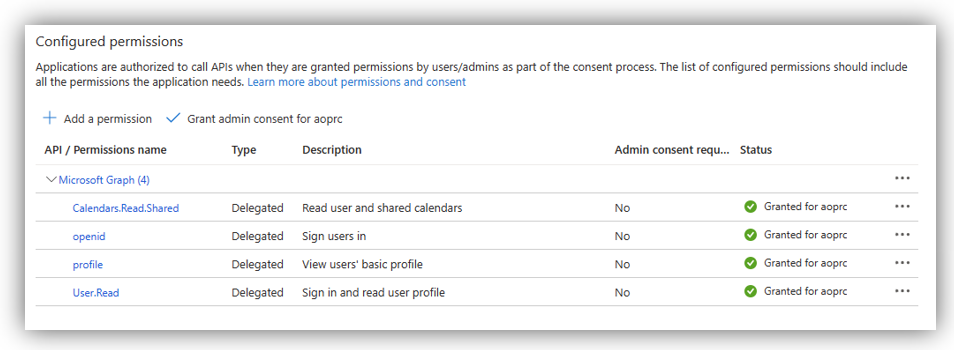
- Search and add the following permissions:
- Calendars.Read.Shared
- openid
- profile
- User.Read
Once you are done, click [Grant admin consent for …] for the added permissions. The result should assemble following figure:
Step 3: Expose an API
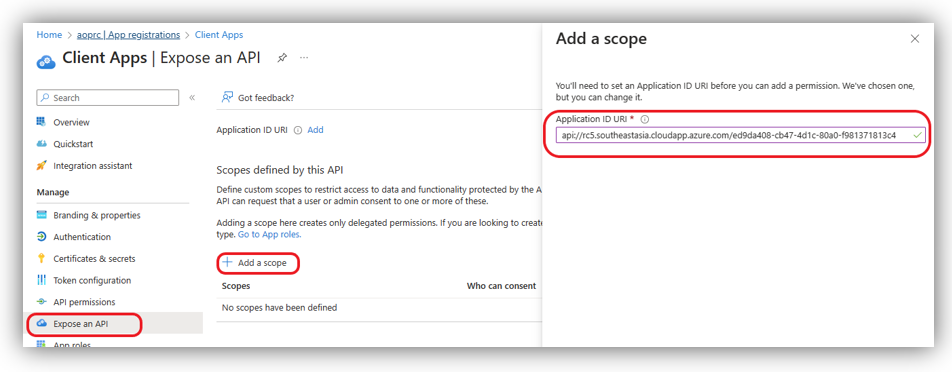
On the Expose an API section, select [Add a scope]. A URI is automatically filled for you. Now, change the value of this field by adding the RC backend URL to this value as follows:
api://[RC backend URL]/[Application (client) ID of this app]
E.g.: api://rc5.southeastasia.cloudapp.azure.com/ed9da408-cb47-4d1c-80a0-f981371813c4
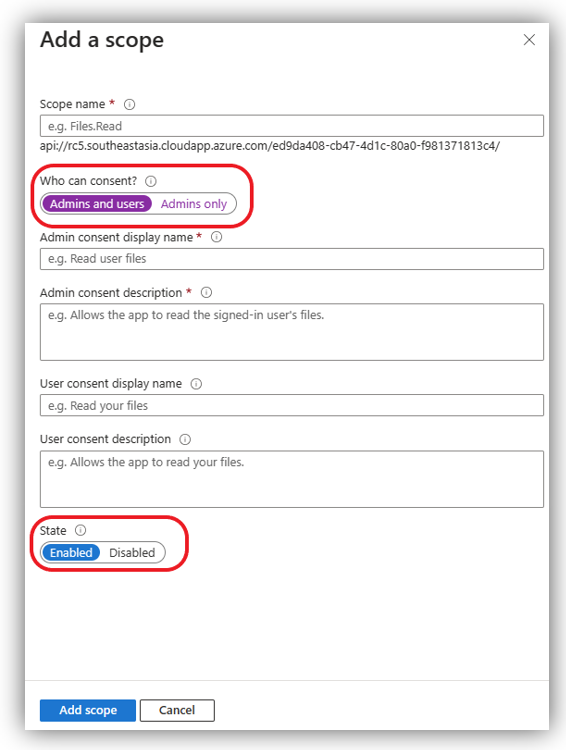
Press [Save and continue] and you will be directed to the following screen that requires you to configure this scope. Fill in the blanks and remember to select [Admins and users] in the “Who can consent?” field and [Enabled] for “State” field.
Press [Add a scope] and you can see the scope added in the Scopes list:
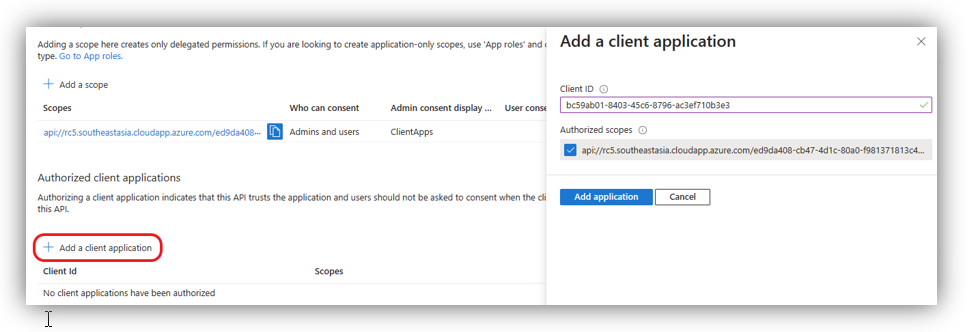
Then, scroll down to the Authorized client applications and click on [Add a client application]:
There are four Client IDs that you can choose, each allows specified Office app to have access. The first and recommended option is the Client ID for all end points:
- For all Microsoft Office application endpoints (highly recommended): ea5a67f6-b6f3-4338-b240-c655ddc3cc8e
Remember to check on the scope you just created and click [Add application]. After adding above client IDs, you can see them displayed on Authorized client application section:
More detailed control can be achieved by specifying a specific application type. However, the deployment of the manifest will happen on all platforms, so if you exclude an app type from below, then the Add-in will be present but not working.
- For Microsoft Office (desktop app): d3590ed6-52b3-4102-aeff-aad2292ab01c
- For Outlook on the web: bc59ab01-8403-45c6-8796-ac3ef710b3e3
- For Office on the web: 93d53678-613d-4013-afc1-62e9e444a0a5
Step 4: Client secret
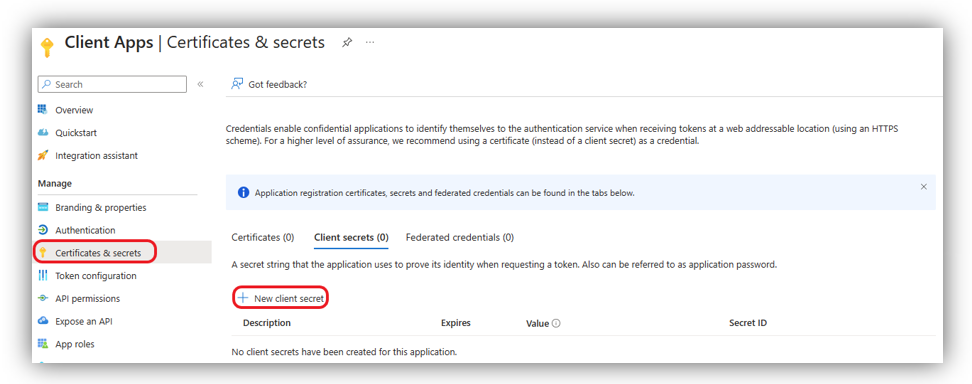
Next, click [Certificates & secrets] ➔ [Client Secret].
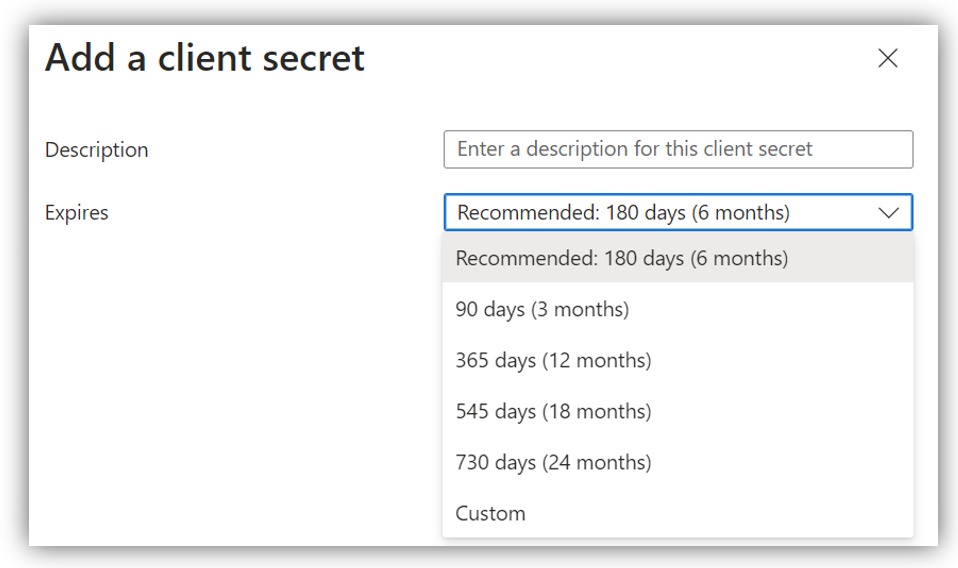
Choose [New client secret], a screen will appear as below:
Enter Description, select Expires time, then click [Add] button. The Value and Secret ID columns will be inserted:
Here, you can get:
- Client Secret: retrieved from Secret’s Value.
Step 5: Retrieve details from app
To retrieve details from this app, navigate to Overview by accessing Azure portal ➔ Manage Microsoft Entra ID ➔ App registrations. Click [All applications] then search/select Client Apps app ➔ select tab Overview.
In this screen, you can see a list of Essentials, in which you can get:
- Tenant ID: retrieved from Directory (Tenant) ID section.
- Client ID: retrieved from Application (Client) ID section.
- Application ID URI
Note:
1. Remember to copy the client secret value from the Azure app right after adding a client secret because it will be hidden the next time you open the app’s Certificates & secrets page.
2. When the secret is going to expire, remember to create a new secret, and use its Value to replace the expired one.
Navigate to RC backend ➔ System ➔ Client Apps ➔ New Outlook Add-in tab and fill in all the fields retrieved from Azure app.
Properties
Applies to: RC 4.3+
Reference: TFS #362997
Knowledge base ID: 0331
Last updated: Mar 20, 2024






Quan Nguyen Hai
Comments