Summary
Configure Windows Authentication on Resource Central backend
PRE-REQUISITE 1: Internet Information Services (IIS) feature “Windows Authentication” must be installed and enabled for the Resource Central site.
PRE-REQUISITE 2: In an upgrade scenario going from 3.7/8 to 4.0, where Windows Authentication is setup, you need to first uninstall of Resource Central and then install the new Resource Central version. This to avoid carrying legacy Windows Authentication settings from the old to the new version.
PRE-REQUISITE 3: On-Premise solution only
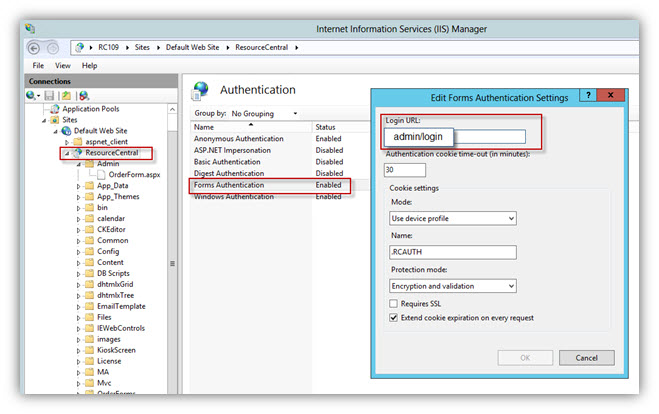
1. Go to Internet Information Services (IIS) Manager → ResourceCentral → Authentication → Edit Forms Authentication Settings. In [Login URL], change it to admin/login
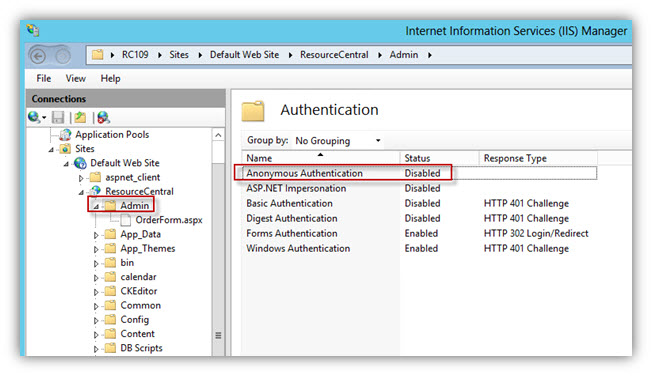
2. Go to Admin folder → Authentication → Disable Anonymous Authentication
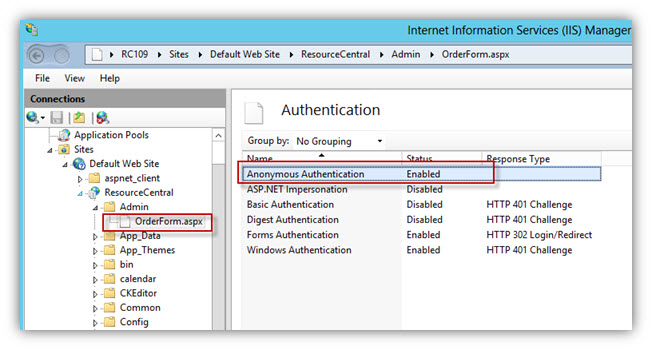
3. Right click Admin and switch to Content view.
In the Content view, right click on [OrderForm.aspx] and select ‘Switch to Features View’. Click on [OrderForm.aspx] (under Admin folder) → Authentication → Enable Anonymous Authentication
Configure Single Sign-On (on Client machine)
PRE-REQUISITE
- RC backend using Windows Authentication
- Client machine and Web server must be in the same domain.
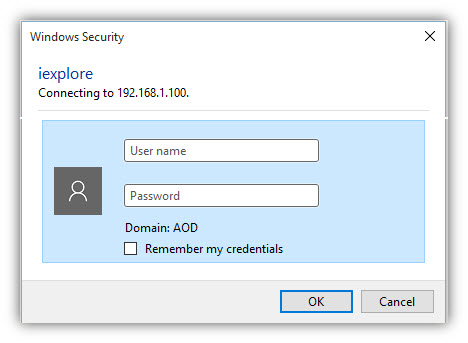
When user accesses to RC backend, “Windows Security” dialog shows up to require users’ credentials, in order for the dialog not to display again for current user, we should follow these steps:
By this time you should be able to login to your site and the only part you are missing is single sign-on. This is easily fixed by going to Internet Options (e.g. through Internet Explorer).
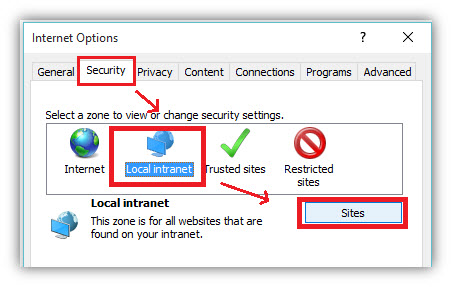
1. Click the Security tab
2. Choose Local intranet and click the [Sites] button.
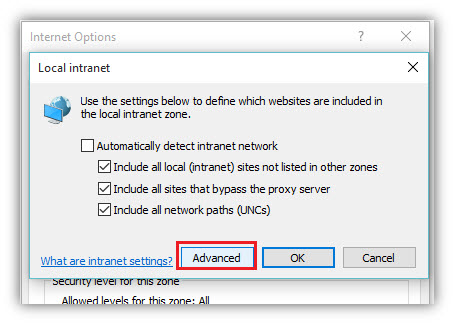
3. Click Advanced.
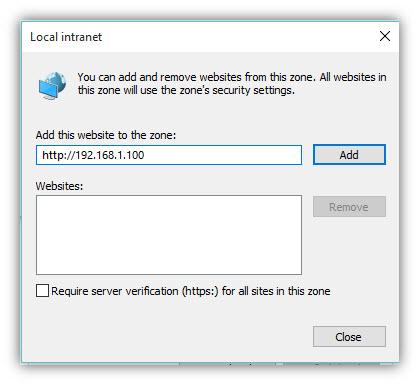
4. Add your intranet domain name (e.g. http://rc.add-on.com) or RC IP address (e.g. http://192.168.1.100) to the list, and then click Close → OK → OK on your way back.
NOTE: Group Policy Object can be used to have this done on multiple machines.
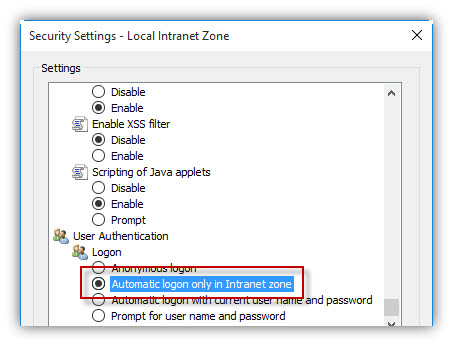
5. Set up automatic logon for current user
Go to Internet Options → Security → Local Intranet → Custom level. Select the option as shown in the following figure:
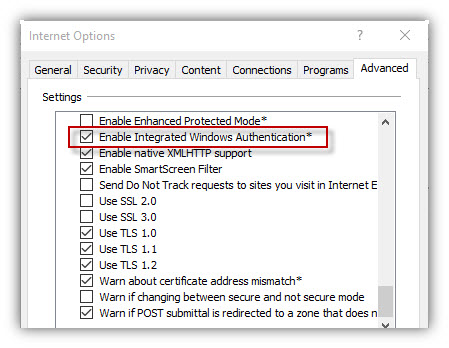
6. Set up Integrated Windows Authentication
Go to Internet Options → Advanced. Scroll down to the bottom. Select the option as shown in the following figure:
Properties
Applies to: RC 4.0
Reference: TFS #118431
Knowledge base ID: 0223
Last updated: Aug 22, 2017
Rolf Szimnau
Comments