Overview
This article provides step-by-step instructions on how to retrieve external authentication details for RC backend login using Microsoft account with SAML2.
Authentication Details for SAML2
Part A. Register application in Azure AD
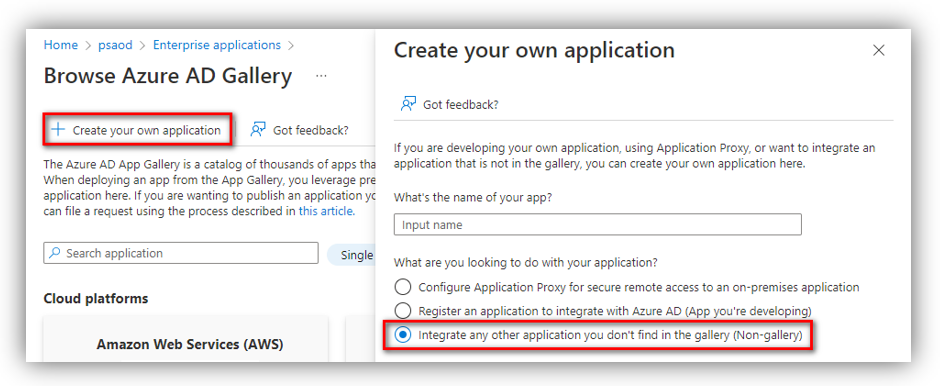
Go to Azure portal ➔ Azure Active Directory ➔ Enterprise applications ➔ Click [New application] which opens ‘Browse Azure AD Gallery’ screen. Then click [Create your own application]
Enter the name of your app, select the 3rd option - ‘Intergrate any other application you don’t find in the gallery’. Then click [Create] button at the bottom of the screen.
Part B. Configure the details for the created Azure AD app
Identifier (Entity ID)
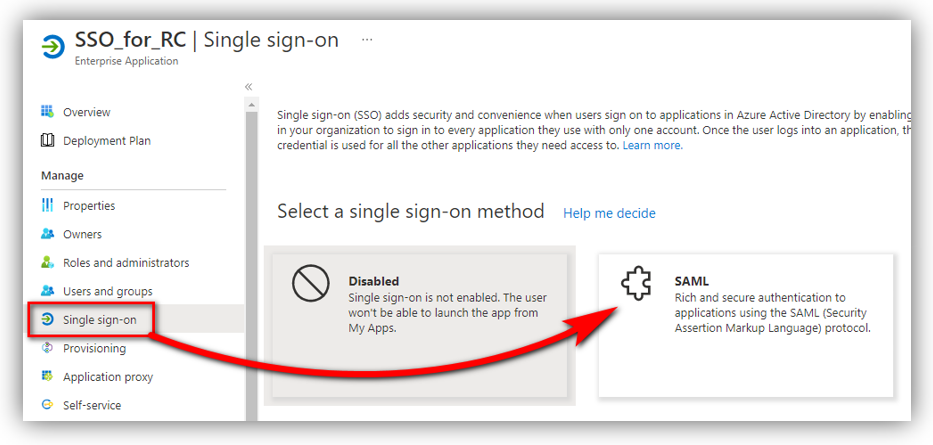
Go to Azure portal ➔ Azure Active Directory ➔ Enterprise applications. Click [View all applications] then select the app that you registered in Part A to see its details. Click [Single sign-on] ➔ SAML
A new panel is opened.
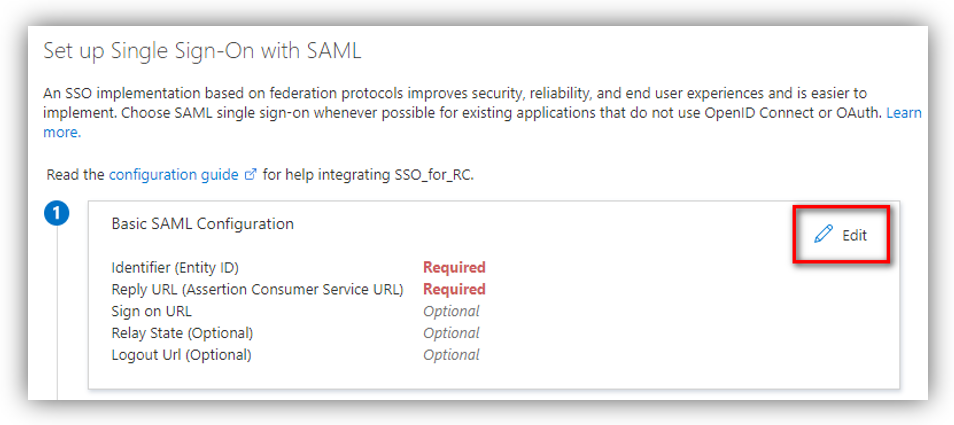
Now click the [Edit] button on the Basic SAML Configuration section. A new panel shows up on the right side of the screen:
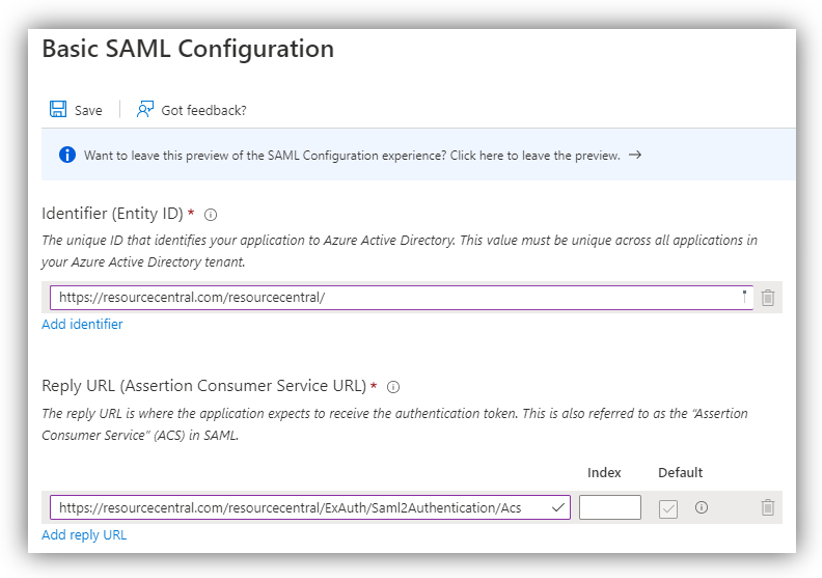
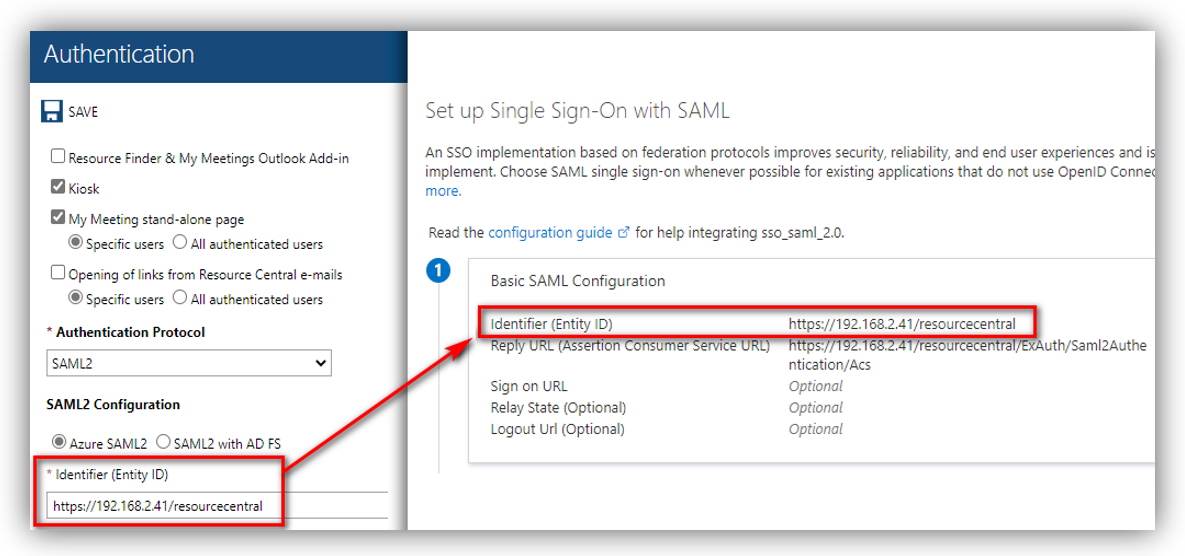
For Identifier (Entity ID), enter the URL of RC backend.
For Reply URL, it can be composed with the following format:
[RC Backend URL]/ExAuth/Saml2Authentication/Acs
In the above example, the RC Backend URL is https://resourcecentral.com/resourcecentral, so the Reply URL you can fill in is:
https://resourcecentral.com/resourcecentral/ExAuth/Saml2Authentication/Acs
Click [Save] to finish.
Login URL, Logout URL and Azure AD Identifier
Go to Azure portal ➔ Azure Active Directory ➔ Enterprise applications ➔ All applications. Then select the app that you registered in Part A to see its details.
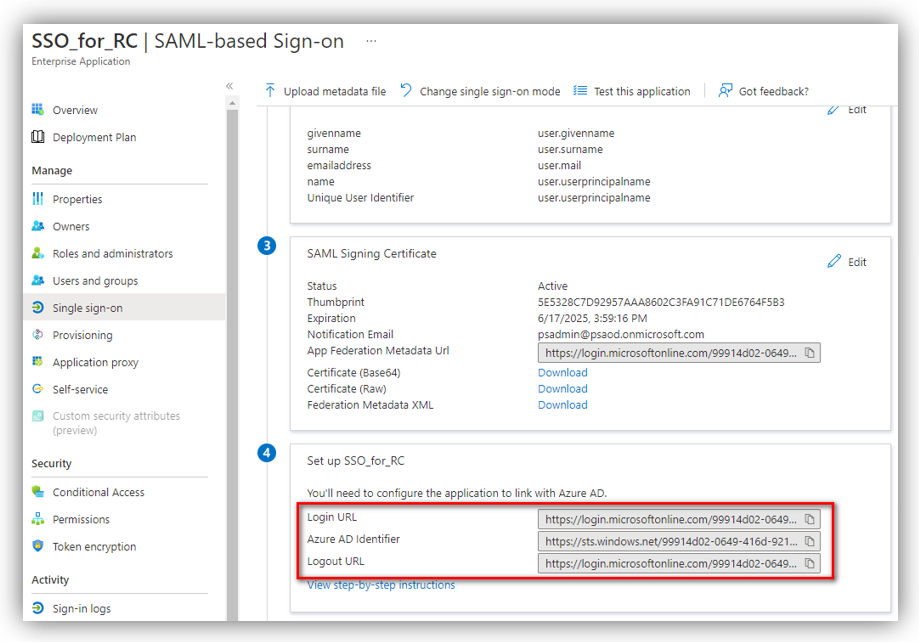
Click [Single sign-on] and scroll down to the Set up [App name] section (i.e., ‘Set up SSO_for_RC’):
You can see the details for Login URL, Logout URL, and Azure AD Identifier highlighted in the above figure.
Return URL
You can compose the Return URL with the following format:
[RC Backend URL]/ExAuth/Saml2Authentication/CallbackHandler
In the above example, the RC Backend URL is https://resourcecentral.com/resourcecentral, so the Reply URL you can fill in is:
https://resourcecentral.com/resourcecentral/ExAuth/Saml2Authentication/CallbackHandler
Certificate (.pfx) and PFX Password
Usually, you have been provided with the .pfx file and the attached password after you buy the certificate (with key). This certificate must be created with the parameter provider = Microsoft Enhanced RSA and AES Cryptographic Provider.
Part C. Configure SAML Signing Certificate
Go to Azure portal ➔ Azure Active Directory ➔ Enterprise applications ➔ All applications then select the app that you registered in Part A to see its details.
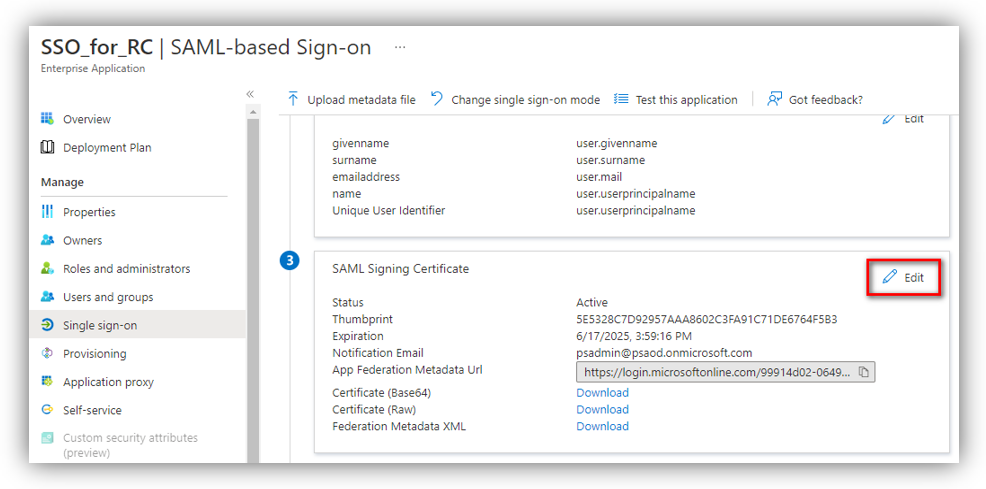
Click [Single sign-on] and scroll down to the ‘SAML Signing Certificate’ then click [Edit]:
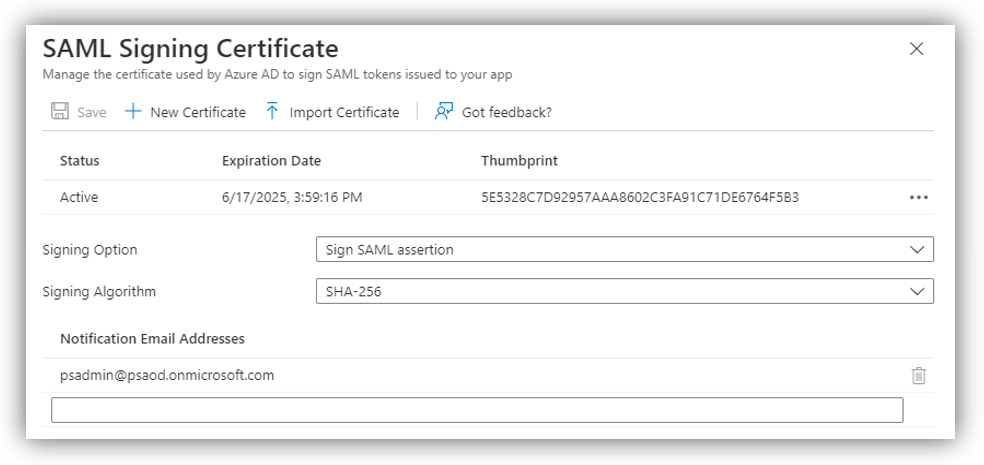
A new panel is opened.
Click [Import certificate] to upload your PFX file.
Part D. Configure External Authentication in the RC backend
Log in to RC backend and click [Authentication] on the left menu. On ‘External Authentication’ section, select SAML2 for ‘Authentication Protocol’ then configure as shown in the following figures:
Properties
Applies to: RC 4.2+
Reference: TFS #339238
Knowledge base ID: 0321
Last updated: Apr 19, 2023


Anh Bach Duy
Comments