Overview
This article provides step-by-step instructions on how to retrieve external authentication details for RC backend login using Microsoft account with SAML.
Requirements
Look at the following table for supported Windows Server versions and ADFS versions supported on these servers:
| Supported Windows Server |
Supported ADFS |
| Windows Server 2016 |
ADFS 4.0 |
| Windows Server 2019 |
ADFS 5.0 |
Authentication Details for SAML2 with ADFS
NOTE: The SAML2 with AD FS protocol has the same code flow as that of SAML2. Therefore, authentication details for SAML2 with AD FS can be input to the data fields of SAML2 protocol.
Refer to ‘Authentication Details for SAML2’ article for more details.
Part A. Configure Active Directory Federation Services (ADFS)
1. Go to web server where your Exchange server is installed, click Start ➔ Server Manager ➔ Tools ➔ AD FS Management
2. In the opened window, select Replying Party Trusts and [Add Replying Party Trust...] from the Actions sidebar. This starts the configuration wizard for a new Replying Party Trust.
3. On the ‘Add Replying Party Trust wizard’ ➔ Welcome screen, select Claims aware, then click [Start].
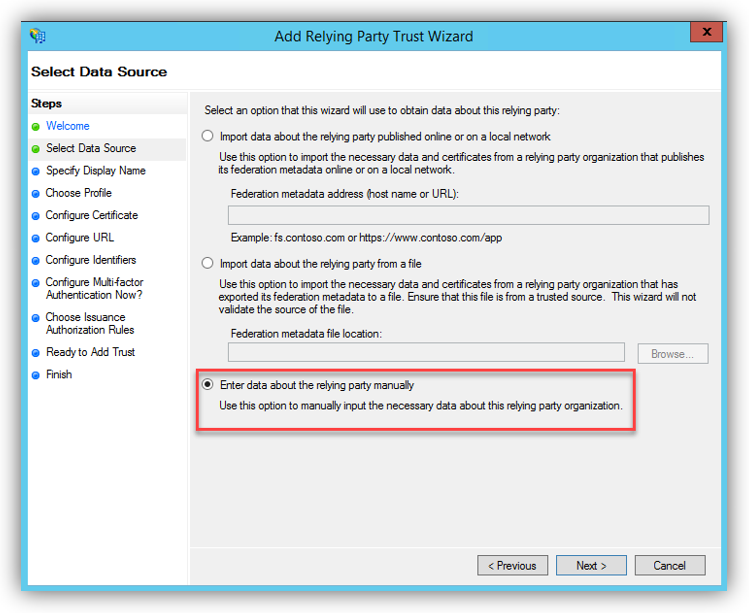
4. In the Select Data Source screen, select option Enter Data About the Party Manually.
Then click [Next] to proceed.
5. On the next screen, enter a Display name that you'll recognize in the future, and any notes you want to make. Then click [Next] to proceed.
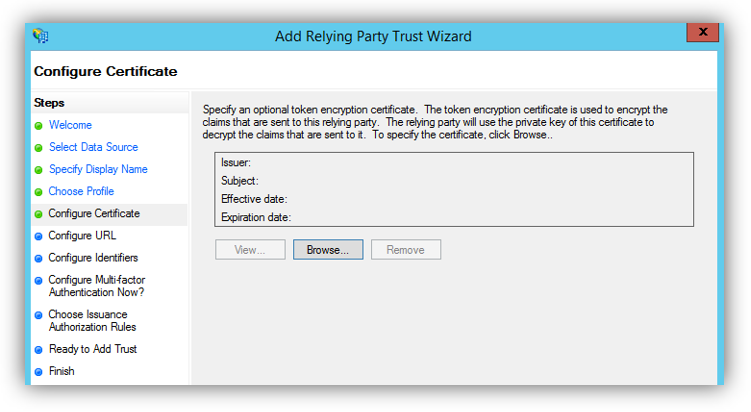
6. On the next screen, leave the certificate settings at their defaults. Then click [Next] to proceed.
7. On the next screen, check on Enable Support for the SAML 2.0 WebSSO protocol. The service URL will have the following format:
Then click [Next] to proceed.
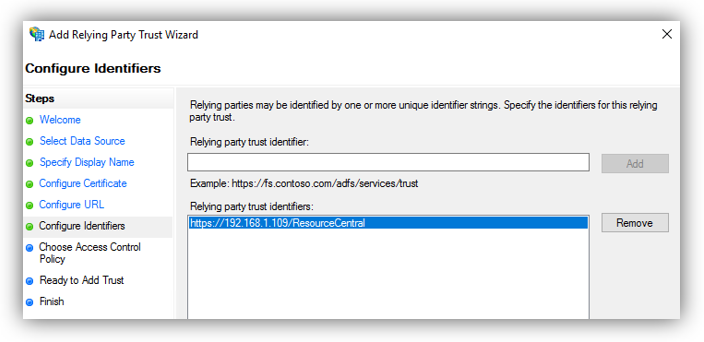
8. On the next screen, add a Relying party trust identifier, you can compose the link with the following format:
Then click [Next] to proceed.
9. On the Choose Access Control Policy screen, leave it as it is and click [Next].
10. On the Ready to Add Trust screen, leave it as it is and click [Next].
11. On the Finish screen, click [Close] to finish.
Part B. Create Claim Rules
Once the relying party trust has been created, you can create the claim rules and update the RPT with minor changes that aren't set by the wizard. By default, the claim rule editor opens once you created the trust. If you want to map additional values beyond authentication.
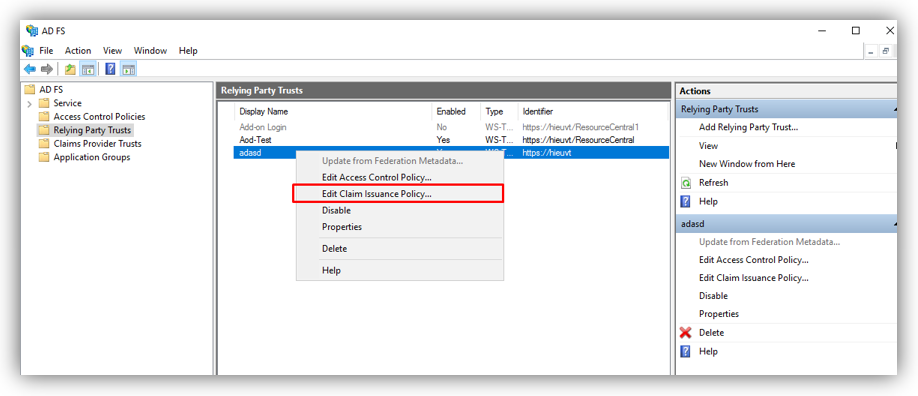
Select a newly created Relying Party Trust, right click, and choose Edit Claim Issuance Policy… from the context menu (or Actions sidebar).
This starts the configuration wizard for a new claim.
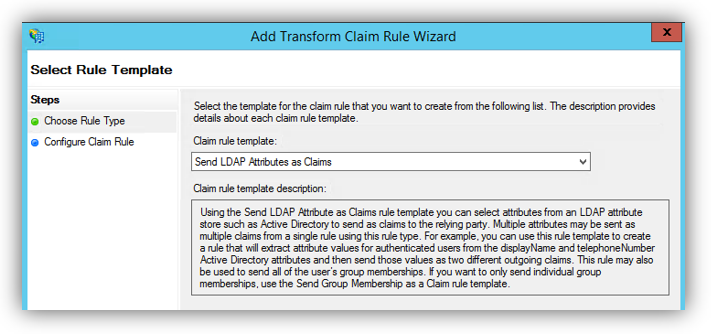
1. To create a new rule, click on Add Rule. Create a Send LDAP Attributes as Claims rule.
2. On the next screen, using Active Directory as your attribute store, do the following:
Line 1:
a. From the LDAP Attribute column, select E-Mail-Addresses.
b. From the Outgoing Claim Type, select E-Mail Address.
Line 2:
- From the LDAP Attribute column, select User-Principal-Name.
- From the Outgoing Claim Type, select Name.
Line 3:
a. From the LDAP Attribute column, select Proxy-Addresses.
b. From the Outgoing Claim Type, select E-Mail Address.
Click [OK] to finish.
Part C. Adjust the trust settings
You still need to adjust a few settings on your relying party trust. To access these settings, select Properties from the Actions sidebar while you have the Replying Party Trusts (RPT) selected.
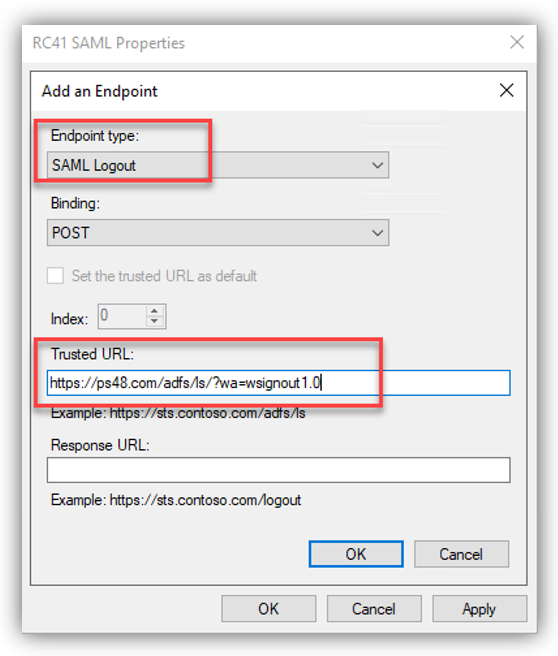
1. In the Endpoints tab, click on add SAML to add a new endpoint.
For the Endpoint type, select SAML Logout.
For the Binding, select POST
For the Trusted URL, create URL using:
a. The web address of your ADFS server
b. The ADFS SAML endpoint you noted earlier
c. The string '?wa=wsignout1.0'
The URL should look something like this: https://sso.yourdomain.tld/adfs/ls/?wa=wsignout1.0
2. Confirm your changes by clicking OK on the endpoint and the RPT properties. You should now have a working RPT for RC.
Part D. Import Certificate on AD FS Server
Usually, you have been provided with the .pfx file and the attached password after you buy the certificate (with key). This certificate must be created with the parameter provider = Microsoft Enhanced RSA and AES Cryptographic Provider.
Now you need to import the certificate on IIS on AD DS Server. Follow these steps:
1. Copy PFX file into AD DS server machine.
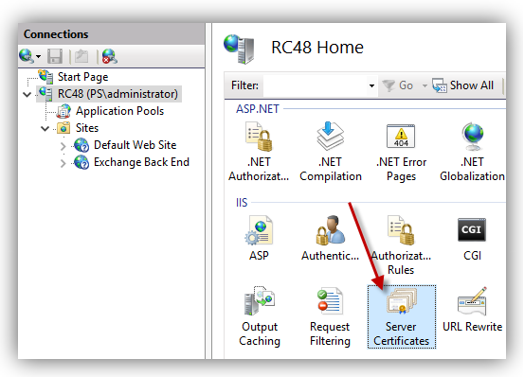
2. Open IIS on AD DS server machine, double click [Server Certificates]:
3. On the list of server certificates, click [Import] on the right panel of the screen:
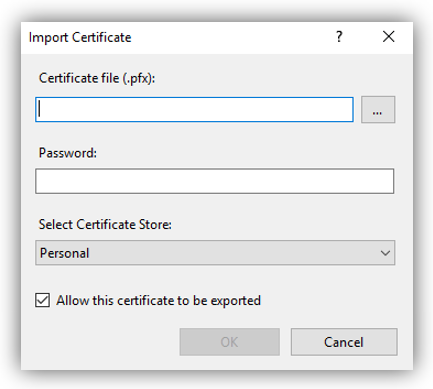
4. On the pop-up dialogue, browse to the Certificate file and input provided password:
5. Open AD FS Management, select [Certificate] à Add Token Signing Certificate…
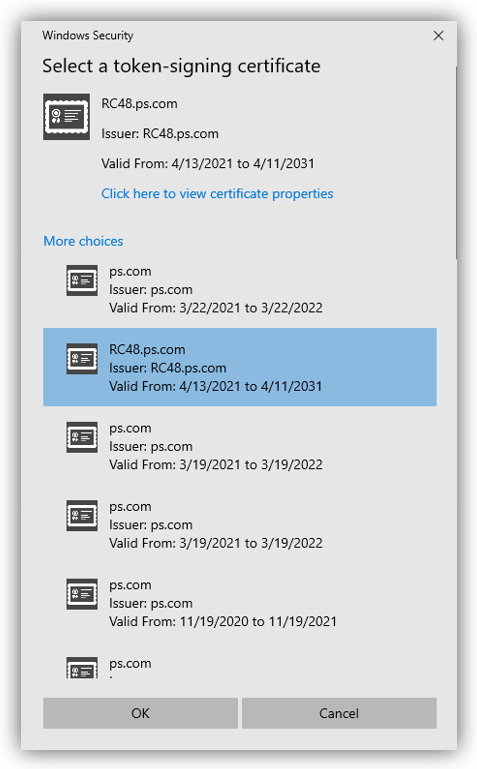
6. A dialogue shows up as shown in the following figure:
Click More choices and select the certificate that you have imported in the previous step. Click [OK].
7. Going back to the main screen, select Add Token-decrypting Certificate… (under Add Token Signing Certificate… button).
Select the imported certificate and lick [OK] to finish.
8. Click on the certificates in 2 sections (Token-decrypting and Token-signing) one after another and set it as Primary:
9. On the main screen, select the primary certificate (that you have just set) in Token-decrypting section and click Set Service Communications Certificate…, a dialogue shows up:
Click More choices, select the imported certificate and click [OK].
10. On the main screen, this time select the primary certificate (that you have just set) in Token-signing section and click Set Service Communications Certificate…, a dialogue shows up. Follow the procedure in step 9 to finish.
Part E. Collect information for RC authentication configuration
Identifier (Entity ID)
Identifier is the value of Replying party trust identifier in Step 8 - Part A of this protocol.
Login URL
1. Go to web server where your Exchange server is installed, click Start ➔ Server Manager ➔ Tools ➔ AD FS Management.
2. In the opened window, select Service ➔ Endpoints. Copy the URL path for the endpoint with type SAML 2.0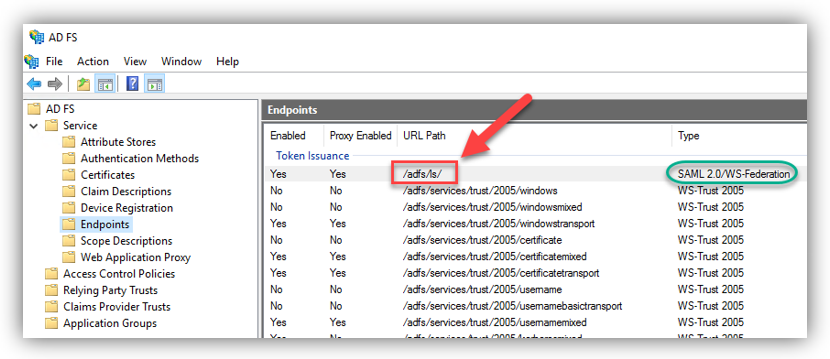
https:// <web_server_URL>/Endpoint_URL_path
For example: https://rc48.ps.com/adfs/ls
Logout URL
Logout URL is the Trusted URL in Step 1 - Part C of this protocol.
Return URL
You can compose the Return URL with the following format:
[RC Backend URL]/ExAuth/Saml2Authentication/CallbackHandler
In the above example, the RC Backend URL is https://resourcecentral.com/resourcecentral, so the Reply URL you can fill in is:
https://resourcecentral.com/resourcecentral/ExAuth/Saml2Authentication/CallbackHandler
Azure AD Identifier
Go to the following link:
https://<server of ADFS>/adfs/.well-known/openid-configuration
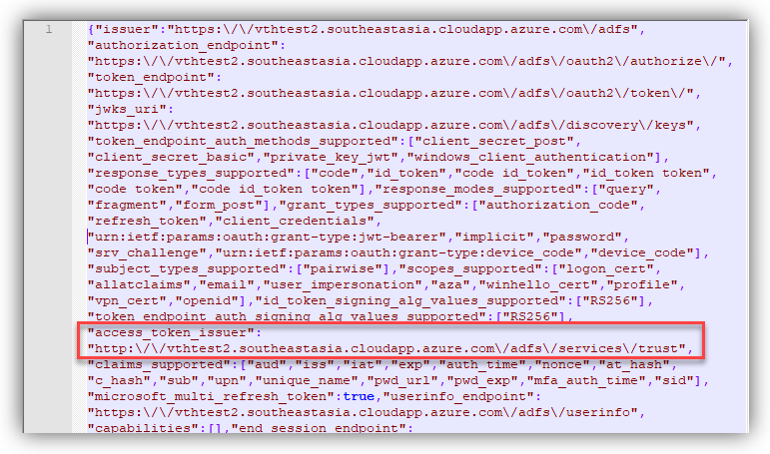
And a json file (openid-configuration.json) will be available for you to download/view. If you download it, open this file with Notepad or Notepad++, look for the keyword: access_token_issuer and you will find the link following it.
Copy the URL, remove the character “\” in the URL and this is the Azure AD Identifier you are looking for.
Certificate (.pfx) and PFX Password
Usually, you have been provided with the .pfx file and the attached password after you buy the certificate (with key). This certificate must be created with the parameter provider = Microsoft Enhanced RSA and AES Cryptographic Provider.
Properties
Applies to: RC 4.2+
Reference: TFS #339238
Knowledge base ID: 0322
Last updated: Jun 12, 2024










Anh Bach Duy
Comments